Clicky clicky for the pattern!
Showing posts with label photo. Show all posts
Monday, 11 March 2013
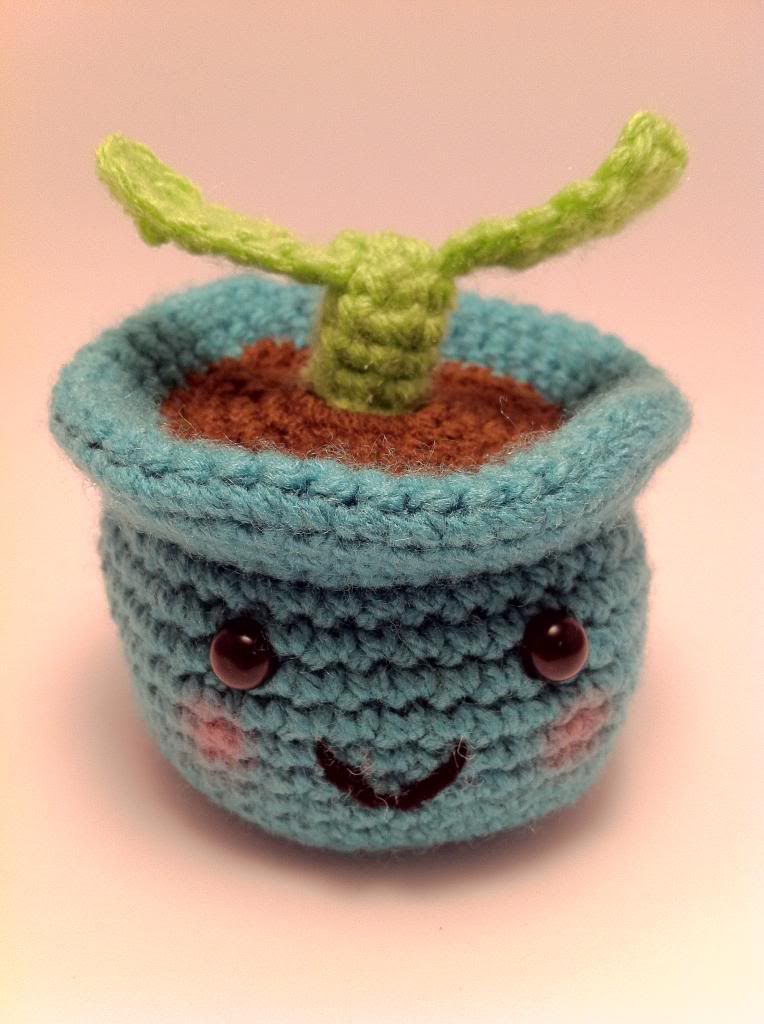
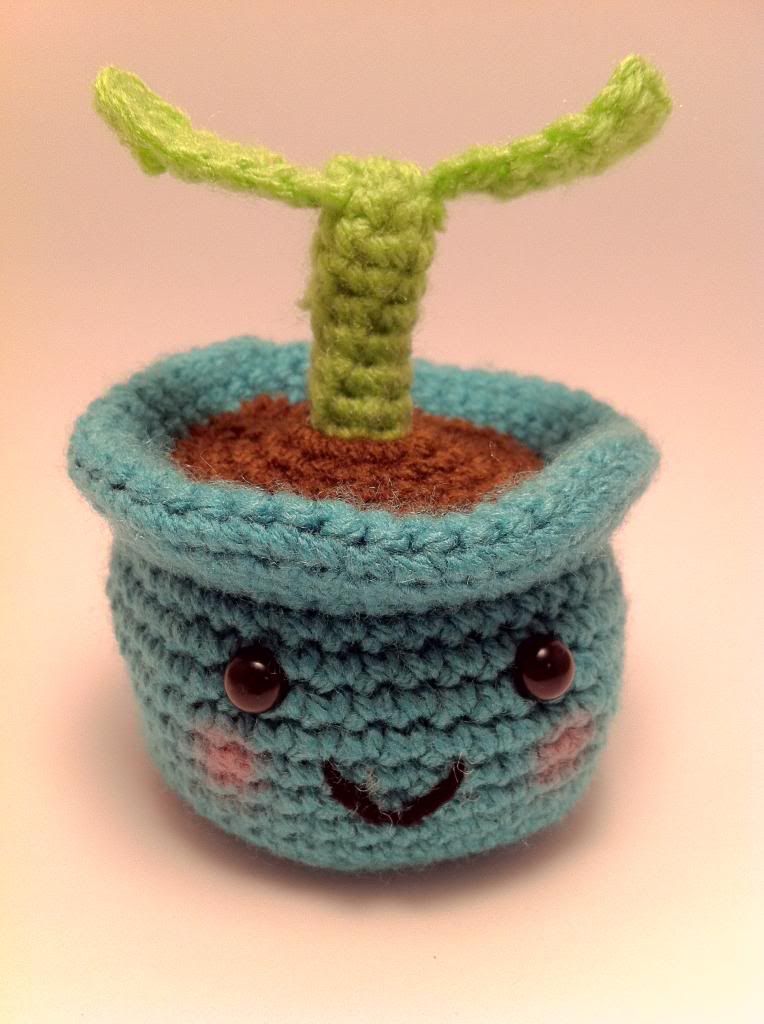
Pull and Grow Amigurumi plant
The pattern for this little plant has been sitting in my bookmarks for months and months. I've been working feverishly on a Very Hungry Caterpillar blanket commission and a new blanket for myself and today had the urge to make something from someone else's pattern. Writing my own patterns is hard slog! It only took me a few hours to make, in between the boring stuff like cleaning the house and prepping food.
Clicky clicky for the pattern!
Tuesday, 26 February 2013
Miss & Master Quick Chick
I sat down last night to make a quick ami, without really having any idea of what I wanted to make. Great designer I am! Anyway, some yellow yarn and a pair of safety eyes later..........I was stuck.
I put the call out on Instagram and Tumblr for suggestions, got a several responses and Quick Chick was born. I am going to make all of the suggestions that got thrown in, they're great!
After a few failed attempts at the beak, wings and feet; here is how she turned out.
She works up quickly and the little bow is just glued on. I reckon she could be made in an evening in front of the chattering cyclops.
ETA: I couldn't help myself and made a little Master to go with Miss. Isn't he dapper?
If you would like to make your own Miss & Master Quick Chick, click here!
Labels:
amigurumi,
bird,
free pattern,
handmade,
link,
photo,
quick chick,
shonamigurumi
Monday, 25 February 2013
Rainbow Ripple Rug
This is, without doubt, the longest running project I've had and it has been an absolute joy to work on. Part of me couldn't wait for it to be finished but at the same time, I didn't want it to be over.
I can't quite believe I made it, sometimes I will just stop, spread it out and admire the pretty colours. I wish I'd made it a little wider but my partner suggested that I do a large border to make it the width I want. This rug was only meant to be a square, as something that protected the lounge from my tootsies. We have an L-shaped lounge that is awesome for gaming that my brother gave us when we moved house. Guess where I sit?
As you can see the rug grew into something much bigger than a square and I'm a bit in love with it!
The basis for this rug came from Lucy at Attic 24. Her blog is a riot of colour and I find it a soothing place to spend time ogling the colours and her enthusiasm for all things hooky. There is a sense of love from her blog, she really invites you in *shrug* I can't really explain it.
I ran out of yarn when I only had one block of 7 ripples to go and the red is not the same shade as the one that has been used for the majority of the blanket. This annoys me. Lesson learned: make sure you buy enough yarn from the same dye lot! Not to worry, this blanket is for me and won't be for sale. The border gave me a bit of grief but I think for a first attempt at a blanket, I did pretty dang good! The difference between border and no border is amazing, it looks so much better with one I think.

Blocking this sucker was...interesting as I don't have a floor space large enough that can be protected from my doggy's fur and feet. I chucked it in the machine with some other washing to make it easier to block and get rid of the slightly chemical smell that the yarn had. Necessity is the mother of invention since I don't have a blocking board so I got some extra large towels and put them outside in the sun on the front deck and pinned the blanket to them. It wasn't perfect by a long shot but it did the job well enough. I think for the next blanket I make, I'll get some styrofoam to stab the pins into. One layer of towels is a bit tenuous! Since it was a pretty warm day yesterday, it didn't take long to dry and I think the heat actually killed the acrylic a little and now the blanket has a lovely drape.
I do believe that is enough banging on so without further ado, photo's!
The last two pics show my favourite spot in our back yard under a big Camphor Laurel tree. I sit out there quite a bit and crochet, drink too much wine and plot my woolly world domination.
I'd love some feedback lovelies!
P.S. For my fellow hookers, I used a 5mm hook and 8ply DK acrylic yarn.
I can't quite believe I made it, sometimes I will just stop, spread it out and admire the pretty colours. I wish I'd made it a little wider but my partner suggested that I do a large border to make it the width I want. This rug was only meant to be a square, as something that protected the lounge from my tootsies. We have an L-shaped lounge that is awesome for gaming that my brother gave us when we moved house. Guess where I sit?
As you can see the rug grew into something much bigger than a square and I'm a bit in love with it!
The basis for this rug came from Lucy at Attic 24. Her blog is a riot of colour and I find it a soothing place to spend time ogling the colours and her enthusiasm for all things hooky. There is a sense of love from her blog, she really invites you in *shrug* I can't really explain it.
I ran out of yarn when I only had one block of 7 ripples to go and the red is not the same shade as the one that has been used for the majority of the blanket. This annoys me. Lesson learned: make sure you buy enough yarn from the same dye lot! Not to worry, this blanket is for me and won't be for sale. The border gave me a bit of grief but I think for a first attempt at a blanket, I did pretty dang good! The difference between border and no border is amazing, it looks so much better with one I think.
Blocking this sucker was...interesting as I don't have a floor space large enough that can be protected from my doggy's fur and feet. I chucked it in the machine with some other washing to make it easier to block and get rid of the slightly chemical smell that the yarn had. Necessity is the mother of invention since I don't have a blocking board so I got some extra large towels and put them outside in the sun on the front deck and pinned the blanket to them. It wasn't perfect by a long shot but it did the job well enough. I think for the next blanket I make, I'll get some styrofoam to stab the pins into. One layer of towels is a bit tenuous! Since it was a pretty warm day yesterday, it didn't take long to dry and I think the heat actually killed the acrylic a little and now the blanket has a lovely drape.
I do believe that is enough banging on so without further ado, photo's!
Much chocolate was consumed in the making of this rug.
This is post-blocking. Looks much better!
The last two pics show my favourite spot in our back yard under a big Camphor Laurel tree. I sit out there quite a bit and crochet, drink too much wine and plot my woolly world domination.
I'd love some feedback lovelies!
P.S. For my fellow hookers, I used a 5mm hook and 8ply DK acrylic yarn.
Saturday, 2 February 2013
My Creative Process
An enormous amount of work goes in to creating something new and getting it out into the world. I have a folder that has a graph book and note paper in it for my pattern writing ideas and designs. The graph paper is useful for giving me an idea on where to start increasing and decreasing. I tend to write a pattern as I'm hooking it and as a result, it ends up being several pages long and notes all over the place. It would be seriously confusing if someone else were to look at it!
It takes me about a month from inception to finished product. During this time I draw, erase, draw, erase, draw, erase, choose colours, change my mind, change it back again then start hooking, writing and taking photo's. Sometimes while I'm making it, I have to frog it because it just isn't turning out the way I want it to. This isn't a bad thing, it's just frustrating. I wish I could get it right first time! There's lots of crossing out of notes and scribbles all over the place and usually a fair bit of cursing and happiness, sometimes in the same breath!
After I finish stuffing and sewing, it's photo shoot time! I have a light tent that I made myself for taking pic's (there will be post about that in the next few days). The photography can be really time consuming. Using my trusty iPhone 4, I take several shots of the piece from different angles, do close ups and change the pose. The light also gets shifted around and sometimes moving the piece only a centimetre or two can really make the difference between an okay shot and great one. I might take 30 photo's of a piece and use only a couple.
When I'm done with taking photo's, I transfer them to my computer and use Picasa 3 to edit the ones I want to use. I've found that since I've started using the light tent, my photo quality has really improved and I don't need to do nearly as much editing as I did when I was using a sheet as the backdrop. More on that in the upcoming photography post!
Typing up the pattern comes next, some I sell, others are free. I use the Open Office suite instead of Microsoft because I am cheap (frugal?). It's free and word documents can easily be converted to a .PDF. I like to use PDF's for my patterns online as I can protect the document so it can't be changed or the images copied. The typing generally doesn't take too long, I add photo's that I have taken during the creating so that whoever is reading the pattern, has pictures to refer to and it gives them an idea of what it should look like.
After all that is done, the uploading begins! Pictures of items and patterns that are for sale go on Etsy and Facebook, free patterns go on my blog and Ravelry and the photo's get uploaded to Facebook, Ravelry and right here on my blog. Sometimes I add them to my Flickr account too but I usually forget >_<
So there you have it, a run down of how I go about making new stuff and getting it out there. One of these days I'll get much more organised about getting it all to happen in one hit rather than all over the place.
| My amigurumi folder with note paper and graph book. |
It takes me about a month from inception to finished product. During this time I draw, erase, draw, erase, draw, erase, choose colours, change my mind, change it back again then start hooking, writing and taking photo's. Sometimes while I'm making it, I have to frog it because it just isn't turning out the way I want it to. This isn't a bad thing, it's just frustrating. I wish I could get it right first time! There's lots of crossing out of notes and scribbles all over the place and usually a fair bit of cursing and happiness, sometimes in the same breath!
| Pattern writing progress, looks like a mess! |
After I finish stuffing and sewing, it's photo shoot time! I have a light tent that I made myself for taking pic's (there will be post about that in the next few days). The photography can be really time consuming. Using my trusty iPhone 4, I take several shots of the piece from different angles, do close ups and change the pose. The light also gets shifted around and sometimes moving the piece only a centimetre or two can really make the difference between an okay shot and great one. I might take 30 photo's of a piece and use only a couple.
| DIY light tent |
When I'm done with taking photo's, I transfer them to my computer and use Picasa 3 to edit the ones I want to use. I've found that since I've started using the light tent, my photo quality has really improved and I don't need to do nearly as much editing as I did when I was using a sheet as the backdrop. More on that in the upcoming photography post!
Typing up the pattern comes next, some I sell, others are free. I use the Open Office suite instead of Microsoft because I am cheap (frugal?). It's free and word documents can easily be converted to a .PDF. I like to use PDF's for my patterns online as I can protect the document so it can't be changed or the images copied. The typing generally doesn't take too long, I add photo's that I have taken during the creating so that whoever is reading the pattern, has pictures to refer to and it gives them an idea of what it should look like.
After all that is done, the uploading begins! Pictures of items and patterns that are for sale go on Etsy and Facebook, free patterns go on my blog and Ravelry and the photo's get uploaded to Facebook, Ravelry and right here on my blog. Sometimes I add them to my Flickr account too but I usually forget >_<
So there you have it, a run down of how I go about making new stuff and getting it out there. One of these days I'll get much more organised about getting it all to happen in one hit rather than all over the place.
Labels:
creative process,
DIY,
link,
photo,
rambling,
shonamigurumi
Tuesday, 29 January 2013
#widn
Even though its going to be hot for another couple of months, I've started my next scarf. I'm pretty sure I won't be selling it, although if there is any interest I just might! This is my progress so far, I started it last night and have done another 2 rows this morning.
I bought 2 skeins of yarn for this project thinking it would be enough but I'm not sure it will be, so I'm going back to get more as soon I can get myself organised to get out the door.
P.S. The pattern can be found here.
I bought 2 skeins of yarn for this project thinking it would be enough but I'm not sure it will be, so I'm going back to get more as soon I can get myself organised to get out the door.
P.S. The pattern can be found here.
Wednesday, 23 January 2013
Rainbows and other pretty's
Turns out I like rainbows. Well, who doesn't right? What I mean is that I like the colour graduation and frankly, I just like lots of colour so these gorgeous iPhone covers are the latest things to fall off my hook. I like them so much I'm going to make one for myself. The ones you see here are for sale through my Etsy store if you want to pick one up! (After 7pm AEST 23/1/13)
They suit iPhone's 3 and 4 that don't have a case on them. I have a screen protector on mine (iPhone 4) and use a cosy to keep my phone safe from dings and whatnot. I will be making some slightly larger cosy's to accommodate a case as well in the near future.
I couldn't find a star pattern that quite suited my needs so I wrote a very simple one. The flower was an unfinished project from something else, but I like how it looked with the cosy so it all of a sudden went from and unfinished object (UFO) to a finished one.
They suit iPhone's 3 and 4 that don't have a case on them. I have a screen protector on mine (iPhone 4) and use a cosy to keep my phone safe from dings and whatnot. I will be making some slightly larger cosy's to accommodate a case as well in the near future.
I couldn't find a star pattern that quite suited my needs so I wrote a very simple one. The flower was an unfinished project from something else, but I like how it looked with the cosy so it all of a sudden went from and unfinished object (UFO) to a finished one.
Labels:
crochet,
etsy,
flower,
for sale,
heart,
link,
phone cozy,
photo,
rainbow,
shonamigurumi,
star
Tuesday, 15 January 2013
Accessories
I took the plunge recently and started buying things from Ebay (I know, sometimes I'm a bit slow). Buying safety eyes and whatnot from the craft store is ridiculously expensive in comparison. Anyhoo, I bought some key chain doohickey's off Ebay to have a shot at doing some, you guessed it, key chains. They could be bag charms too, whatever blows your hair back really. I think they are pretty cute, the angel is my fave, she turned out better than I had hoped for! She's also my first ami that I've ever put blushy cheeks on. Here they are in no particular order, because blogger is annoying like that...
Thursday, 6 December 2012
Bookmarks
I am an avid reader and have more books than will fit on the shelves at home, so invariably, I end up with piles of books next to the bed and pretty much anywhere else I read. For many years I have folded over the corner of the page I was up to, before putting a book down (or more likely falling asleep with it in my hand and being woken with a fright by my partner THEN folding the page). I learned how to make 2-dimensional things like flowers and stars so I made a few very simple book marks.
You need your favourite hook (mine is 3.5mm), yarn, scissors and tapestry needle.
Make a chain to your desired length, finish off, leaving a length for attaching to the top piece.
Make a flower or star or whatever you like really and attach it to your chain with the tapestry needle. I added a bead to the end of mine but getting them to stay on was/is a work in progress. I don't want a big knot at the base because I find it a bit uggs, but haven't come up with a better plan yet.
You need your favourite hook (mine is 3.5mm), yarn, scissors and tapestry needle.
Make a chain to your desired length, finish off, leaving a length for attaching to the top piece.
Make a flower or star or whatever you like really and attach it to your chain with the tapestry needle. I added a bead to the end of mine but getting them to stay on was/is a work in progress. I don't want a big knot at the base because I find it a bit uggs, but haven't come up with a better plan yet.
Buggin'....
Ladybug was made at the request of one of my Facebook liker's. After I made one, I quickly had requests for another 2 which was really exciting! The pattern for these gorgeous girls come from the Lion Brand Yarn site. They have tonnes of patterns for knitters and hookers (teeheehee, I've always wanted to use that term!) alike. Mine are a little different to the ones on their page but very cute nonetheless!
Phone Cover Cozy
These phone covers are just so simple: a chain, single crochet around and around until it's the height you want and slip stitch the top row to finish. The rainbow one I just did single crochet until I got it to the height I wanted, then chained one, turned and continued like this to create the length of the flap and added a button to close it. The inspiration for these came from here. It's a fabulous site =)
Monday, 5 November 2012
Whale of a time
This little guy is my cars' mascot, he's jammed up against the windscreen to keep an eye on what's coming toward me. He is still one of my favourite ami's that I ever made. Again, he was pretty simple, all single crochet and slip stitches. His design can be found here. The link will take you to a pattern for an Orca but I changed the colours and didn't do the cheek patches.
Subscribe to:
Posts (Atom)
.jpg)


