Showing posts with label handmade. Show all posts

Monday, 4 March 2013

The Very Hungry Caterpillar

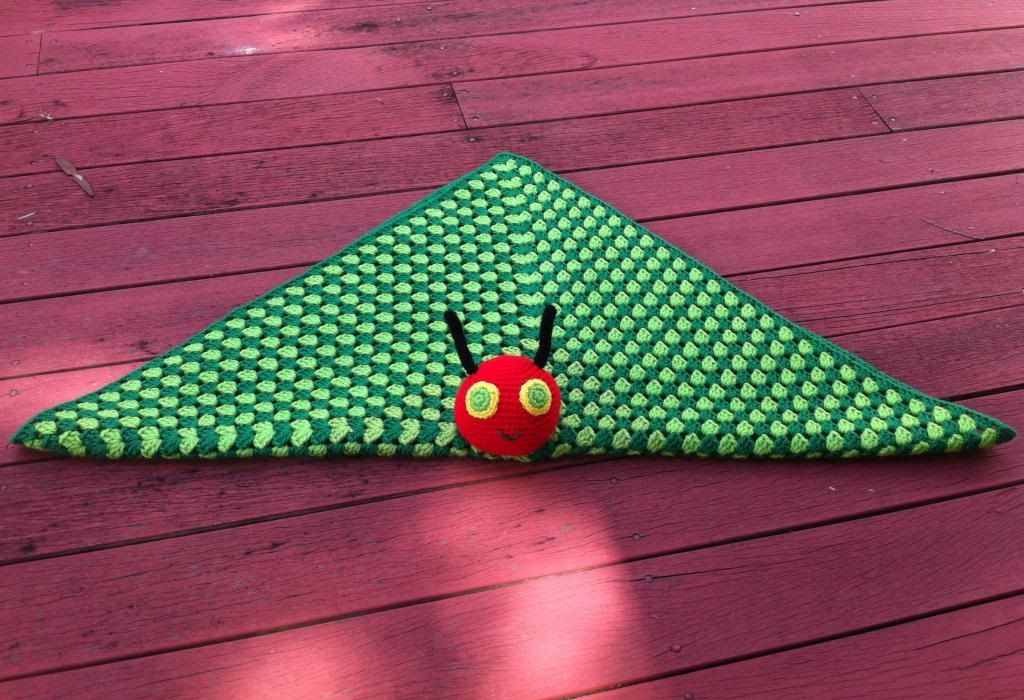
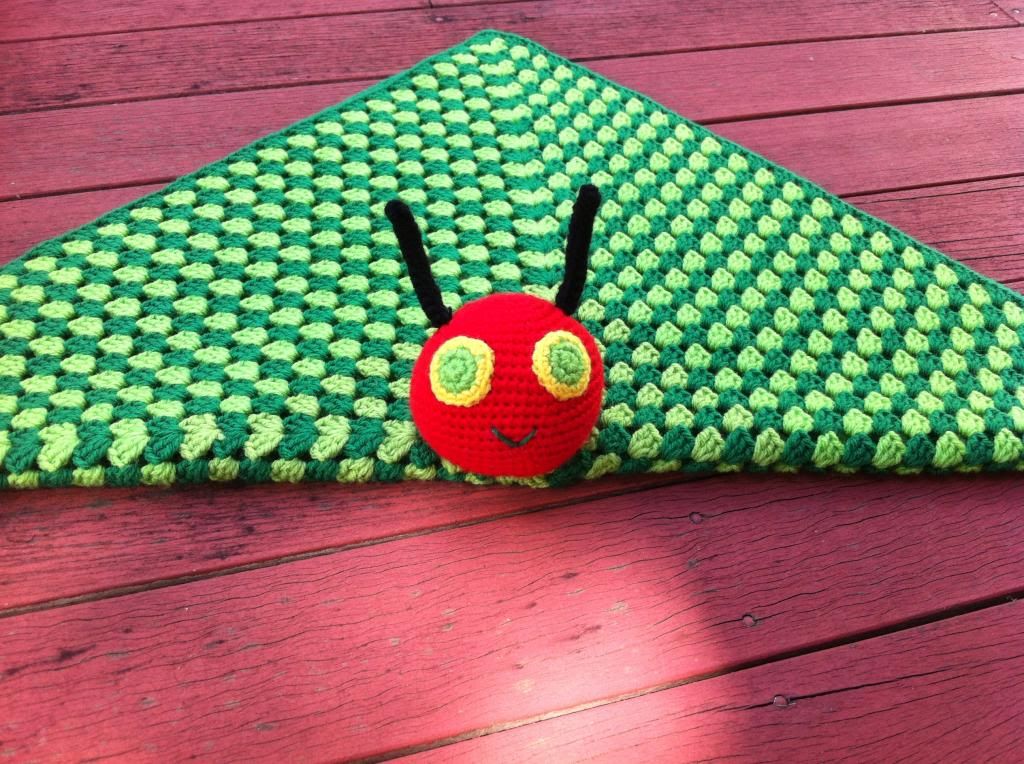
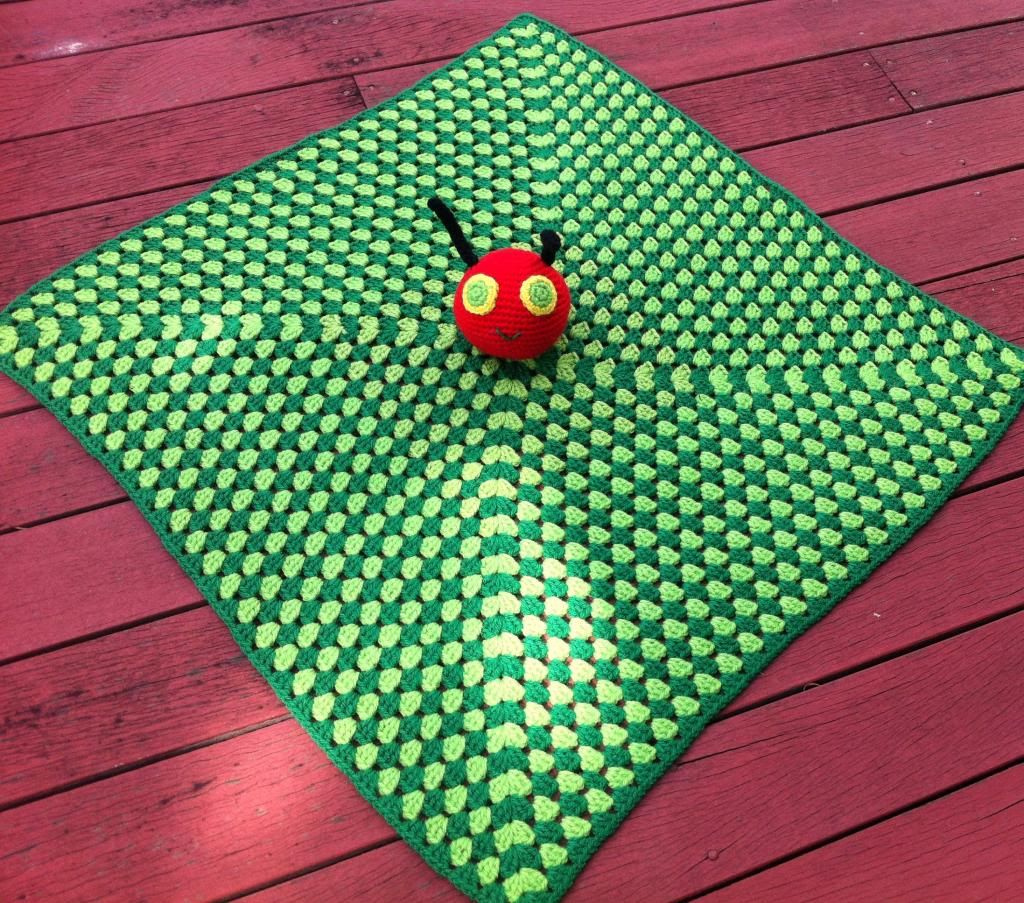
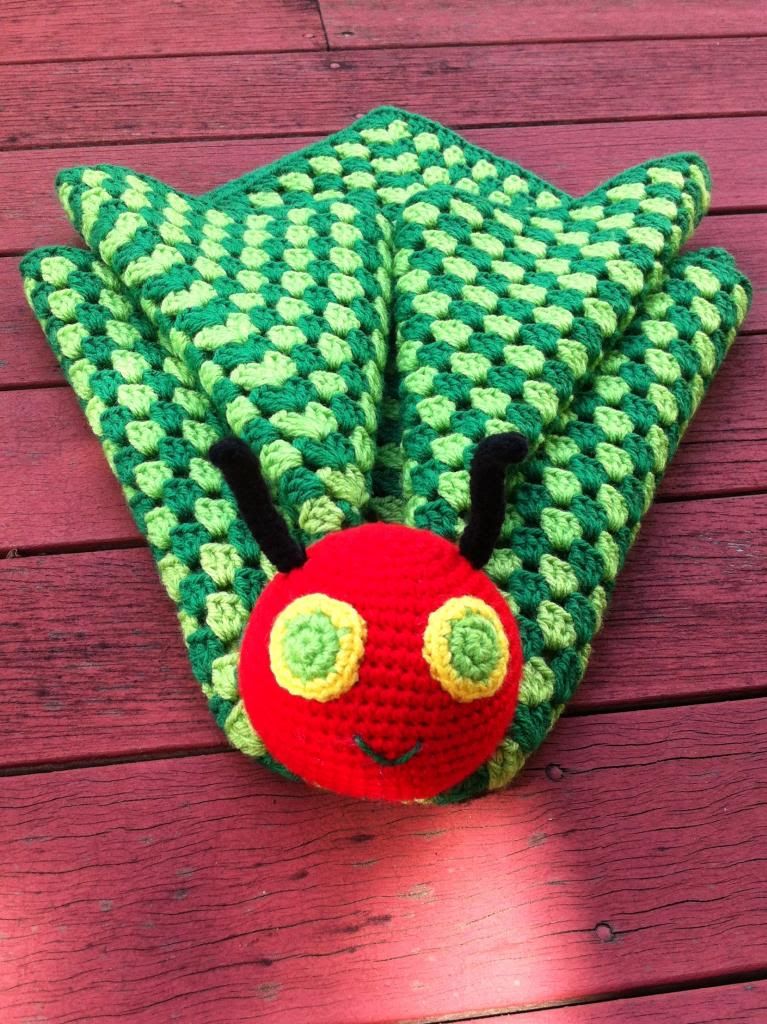
I recently became an Aunty to the most beautiful boy that has ever graced this earth (ok, so I'm a bit biased).  My mum was telling me that she was reading The Very Hungry Caterpillar book to him and he was engaging with the book and the colours.  He's only 5 months old but this is terribly exciting and I wanted to make him a little security blankey that he could have for keeps, or until he gets bored with it. Either or.

I saw someone on Instagram had made one but I cannot for the life of me remember who it was so I can't credit them with the inspiration unfortunately.

The method I used is very simple, just a big granny square and an amigurumi head of my own design.  The head is sewn on to the blanket with black yarn.  I blocked the blanket before sewing the head on to make it softer and drapier.  See that? I just made up a word.  I have to say, I think it turned out pretty well.  It still needs a little fine tuning but I already have an order for another one so I know where to do things differently. Make sure I have yarn in all the same shades for example.  You can't see it in the pictures but the first few rounds of light green are different to the rest.

Have some pictures!


Details for fellow hookers: 4mm hook used for blanket, 3.5mm hook for amigurumi head and 100% acrylic DK yarn.  Blanket measures approx 56cm x 56cm after blocking.

I'd love some feedback dear readers :)


Tuesday, 26 February 2013

Miss & Master Quick Chick

I sat down last night to make a quick ami, without really having any idea of what I wanted to make.  Great designer I am!  Anyway, some yellow yarn and a pair of safety eyes later..........I was stuck.


I put the call out on Instagram and Tumblr for suggestions, got a several responses and Quick Chick was born.  I am going to make all of the suggestions that got thrown in, they're great!

After a few failed attempts at the beak, wings and feet; here is how she turned out.


She works up quickly and the little bow is just glued on.  I reckon she could be made in an evening in front of the chattering cyclops.

ETA: I couldn't help myself and made a little Master to go with Miss.  Isn't he dapper?


If you would like to make your own Miss & Master Quick Chick, click here!


Thursday, 7 February 2013

Photography

I've been a keen photographer for many years, since I was a teen really.  I don't have a spectacular camera, although I will one day!  The camera I use for photographing my crochet is my my trusty iPhone 4.  I have another point-and-shoot digital camera but it doesn't take very good close ups, they are too grainy.  A little bit tragic that the best camera I own is in my phone (yeah yeah, first world problems *lol*).

When I first started making amigurumi, I would photograph them in my bedroom.  It had good natural light, although I did have to time it around when the sun was shining into the room, otherwise I'd end up with over-exposed shots.  I used to use our doona cover as the background, not having anything else at hand.  After a while I started using a neutral coloured sheet as the backdrop when I realised I had a sheet set that doesn't get used.  If I did a very close shot, you could see the threads of the fabric which I didn't really like.

Very recently I made my own light tent.  I'm so pleased with it because now I don't have to photograph in the daytime, I can takes pics whenever I want and for the most part they turn out pretty good.  It was ridiculously cheap to make, the only thing I had to buy was a sheet of white cardboard.

I used an old cardboard box from when we moved house a few months ago and cut windows out of 3 sides.  At the front, I cut away all the cardboard except for a small strip along the bottom.  I use cheap pillows for stuffing my ami's and for some reason I hung on to the fabric the stuffing was in.  It turns out it's really good as a light diffuser!  The piece across the top is fixed on with blu-tack and sticky tape and the side pieces are just stuck on with blu-tack at the top so I can add side lighting if I want.

DIY light tent waiting patiently to serve it's purpose :)


As you can see it sits on a dining chair with a flexible reading light above it.   Very low budget here (as happens when you don't have a paying job)!  Sometimes I grab another reading light to help things along if the shadows are too pronounced.  I love this little thing, it has improved my photo quality a lot.  Now I have visions of another 2 lights on the sides and different coloured backgrounds to show of my crochet goodies!

Photographing crochet can take ages.  Sometimes I can get the images I want with only a couple of shots, other times, it might be 30 or more before I give up in frustration and make the best of what I have.

Got a question or a comment?  I'd love to hear it!
Tuesday, 29 January 2013

#widn

Even though its going to be hot for another couple of months, I've started my next scarf.  I'm pretty sure I won't be selling it, although if there is any interest I just might!  This is my progress so far, I started it last night and have done another 2 rows this morning.


I bought 2 skeins of yarn for this project thinking it would be enough but I'm not sure it will be, so I'm going back to get more as soon I can get myself organised to get out the door.

P.S. The pattern can be found here.

Tuesday, 15 January 2013

Accessories

I took the plunge recently and started buying things from Ebay (I know, sometimes I'm a bit slow).  Buying safety eyes and whatnot from the craft store is ridiculously expensive in comparison.  Anyhoo, I bought some key chain doohickey's off Ebay to have a shot at doing some, you guessed it, key chains.  They could be bag charms too, whatever blows your hair back really.  I think they are pretty cute, the angel is my fave, she turned out better than I had hoped for!  She's also my first ami that I've ever put blushy cheeks on.  Here they are in no particular order, because blogger is annoying like that...


Tuesday, 8 January 2013

Ryno Rhinoceros

Say hello to my latest addition!

He has been about a month in the making from conception to photo shoot.  I've written the pattern for him, but haven't typed it up yet and made it all pretty with photo's and what not.

I'm very new to pattern writing so I tend to write it as I'm hooking it to make sure it works.  However if someone would like to test the pattern for me I'd really appreciate it!  Anyway enough of my inane drivel, may I present to you Ryno Rhinoceros!!!


Love him or hate him, it would totally rock my socks (if I were wearing any) to have some feedback!

Tuesday, 1 January 2013

African Flower Owl Hotpad

I've had the idea for this floating around for a while and finally got around to it last week.  Hope you enjoy it, it works up very quickly!


The link for this colourful kitchen addition can be found here or on my patterns page.

Monday, 31 December 2012

Sailor Ted

Isn't he gorgeous?  I'm so proud with my self for managing to get the vision that was in my head onto my hook.

Again, big thanks to Rachel H of Little Yarn Friends for making her pattern free and available to all.


Friday, 28 December 2012

Teddy

My latest effort.  Big thanks to Rachel at Little Yarn Friends for being so kind as to make her patterns free.

The golden coloured yarn for this little guy was incredibly soft, weird since his jumper colour was the same brand, ply and 100% acrylic  Funny how much variation can be in the one brand!  Anyway I'm really happy with how he turned out and he now resides in my spare room for my guests to cuddle up with.


Wednesday, 12 December 2012

Amigurumi Hammer

I'm a little bit proud...

I've just completed my first pattern!!!!!  It  was borne of a need to make something for my Dad for Christmas and I couldn't find a hammer pattern that I liked.  He's a builder so I think this is very appropriate. 

It took me ages to write and I actually stopped for about a week because I was totally stuck.  I made a couple of devil's from another free pattern in the mean time.When I picked up my hammer pattern again, the ideas just flowed and I completed it by the end of the night.  I'm so happy with how it turned out!!  So without further ado, here 'tis!

Amigurumi Hammer


You can purchase the pattern for this ami from either my Etsy store or Funky Bugs!

Thursday, 6 December 2012

Bookmarks

I am an avid reader and have more books than will fit on the shelves at home, so invariably, I end up with piles of books next to the bed and pretty much anywhere else I read.  For many years I have folded over the corner of the page I was up to, before putting a book down (or more likely falling asleep with it in my hand and being woken with a fright by my partner THEN folding the page).  I learned how to make 2-dimensional things like flowers and stars so I made a few very simple book marks.

You need your favourite hook (mine is 3.5mm), yarn, scissors and tapestry needle.

Make a chain to your desired length, finish off, leaving a length for attaching to the top piece.

Make a flower or star or whatever you like really and attach it to your chain with the tapestry needle.  I added a bead to the end of mine but getting them to stay on was/is a work in progress. I don't want a big knot at the base because I find it a bit uggs, but haven't come up with a better plan yet.


Buggin'....

Ladybug was made at the request of one of my Facebook liker's.  After I made one, I quickly had requests for another 2 which was really exciting! The pattern for these gorgeous girls come from the Lion Brand Yarn site.  They have tonnes of patterns for knitters and hookers (teeheehee, I've always wanted to use that term!) alike.  Mine are a little different to the ones on their page but very cute nonetheless!


Phone Cover Cozy

These phone covers are just so simple: a chain, single crochet around and around until it's the height you want and slip stitch the top row to finish.  The rainbow one I just did single crochet until I got it to the height I wanted, then chained one, turned and continued like this to create the length of the flap and added a button to close it.  The inspiration for these came from here.  It's a fabulous site =)


Monday, 5 November 2012

Whale of a time


This little guy is my cars' mascot, he's jammed up against the windscreen to keep an eye on what's coming toward me.  He is still one of my favourite ami's that I ever made.  Again, he was pretty simple, all single crochet and slip stitches.  His design can be found here. The link will take you to a pattern for an Orca but I changed the colours and didn't do the cheek patches.