Clicky clicky for the pattern!
Showing posts with label amigurumi. Show all posts
Monday, 11 March 2013
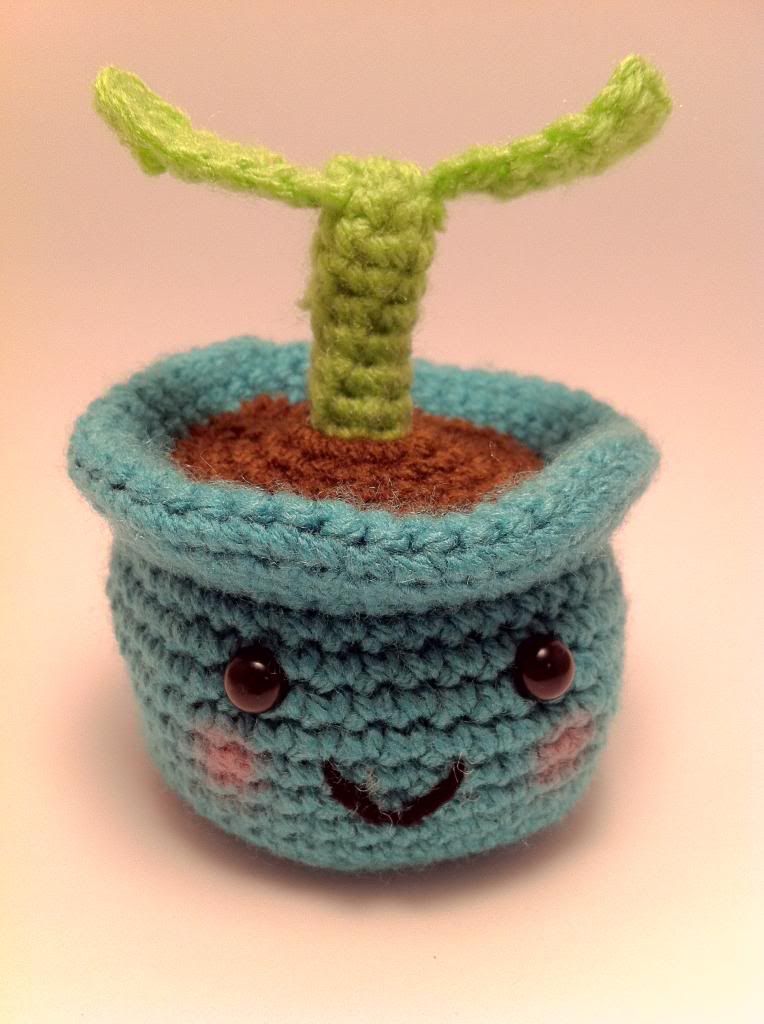
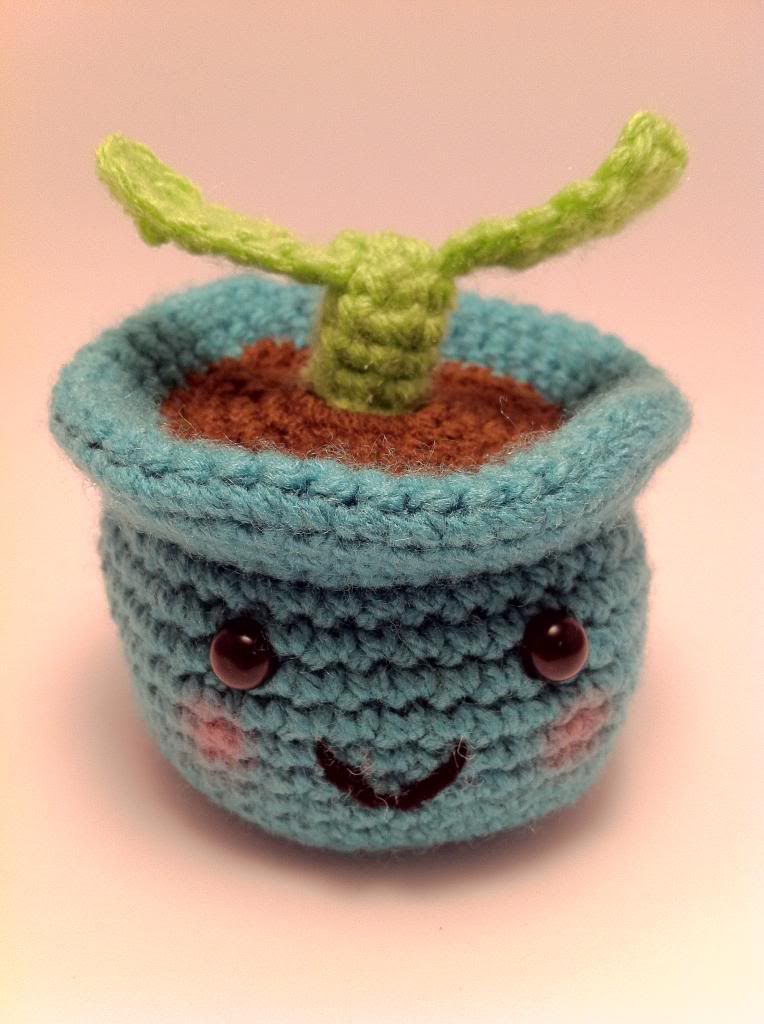
Pull and Grow Amigurumi plant
The pattern for this little plant has been sitting in my bookmarks for months and months. I've been working feverishly on a Very Hungry Caterpillar blanket commission and a new blanket for myself and today had the urge to make something from someone else's pattern. Writing my own patterns is hard slog! It only took me a few hours to make, in between the boring stuff like cleaning the house and prepping food.
Clicky clicky for the pattern!
Monday, 4 March 2013
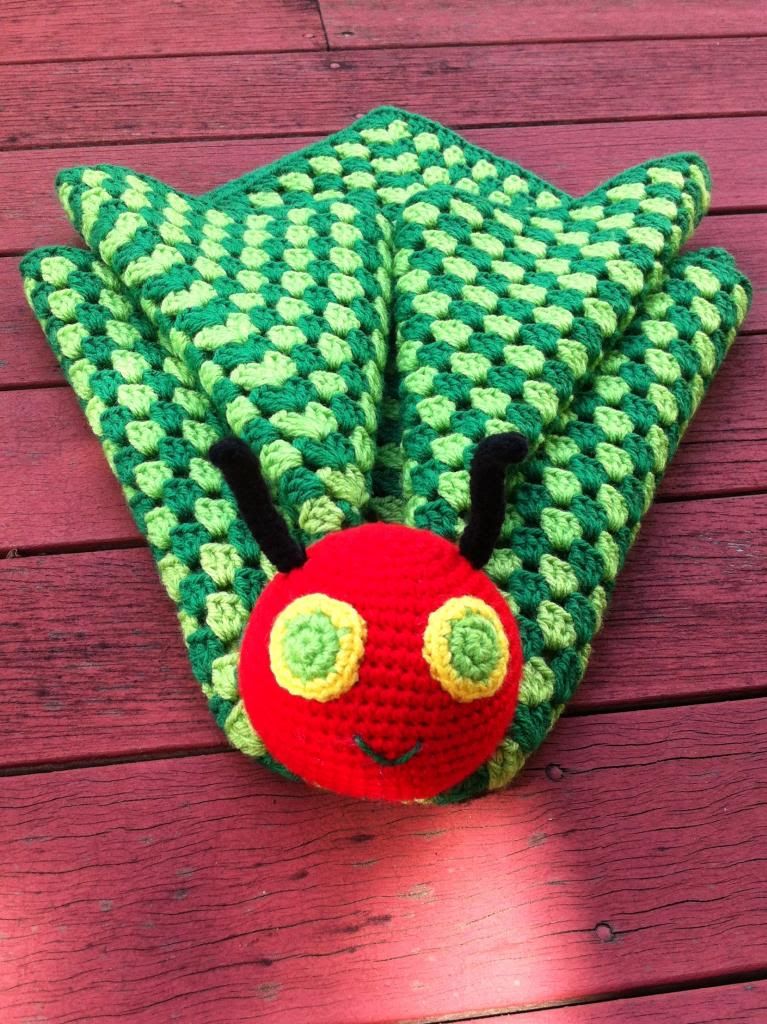
The Very Hungry Caterpillar
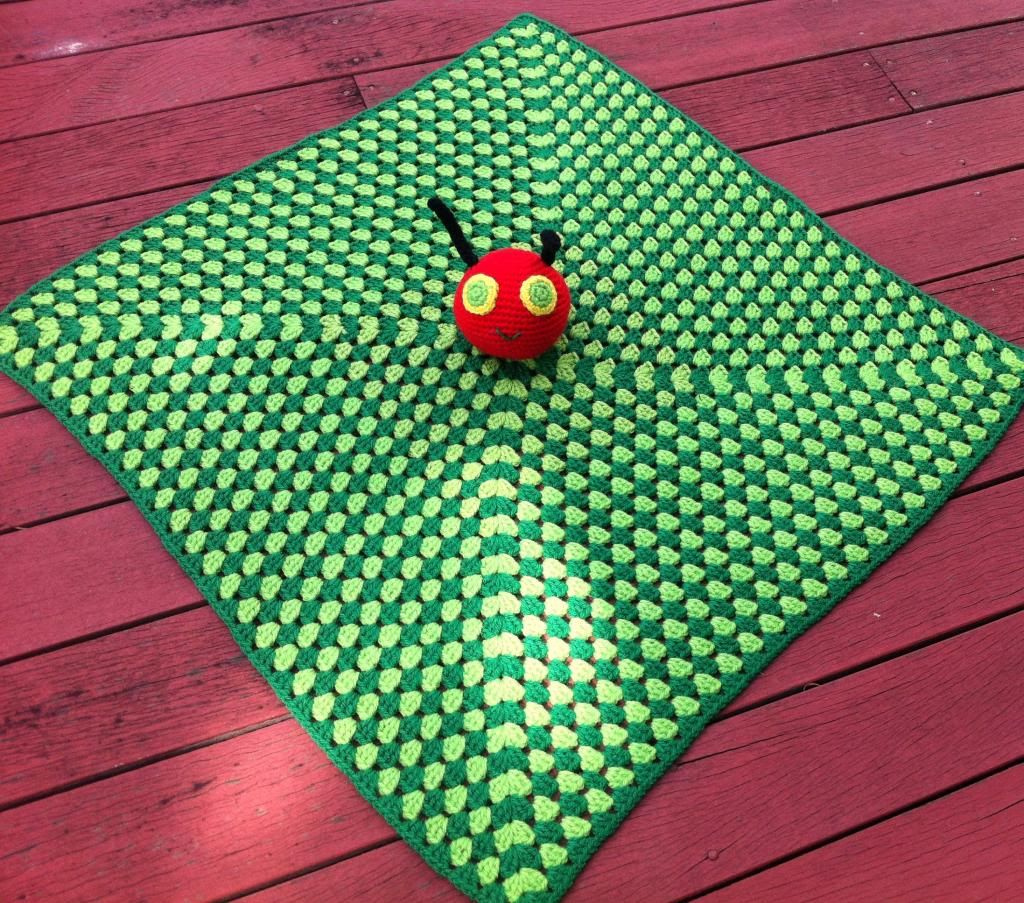
I recently became an Aunty to the most beautiful boy that has ever graced this earth (ok, so I'm a bit biased). My mum was telling me that she was reading The Very Hungry Caterpillar book to him and he was engaging with the book and the colours. He's only 5 months old but this is terribly exciting and I wanted to make him a little security blankey that he could have for keeps, or until he gets bored with it. Either or.
I saw someone on Instagram had made one but I cannot for the life of me remember who it was so I can't credit them with the inspiration unfortunately.
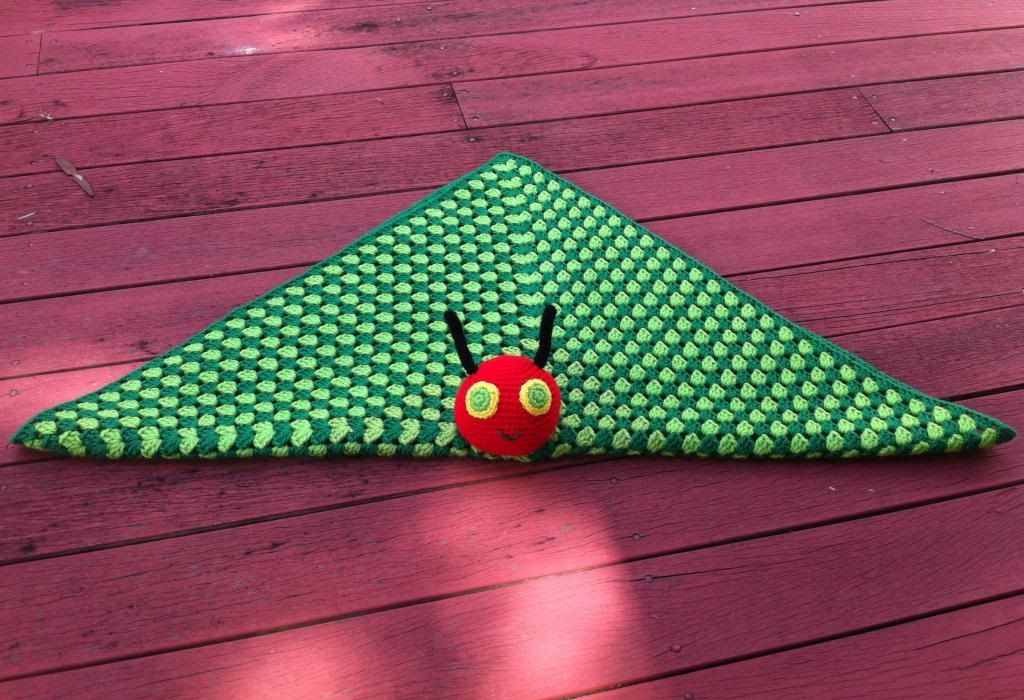
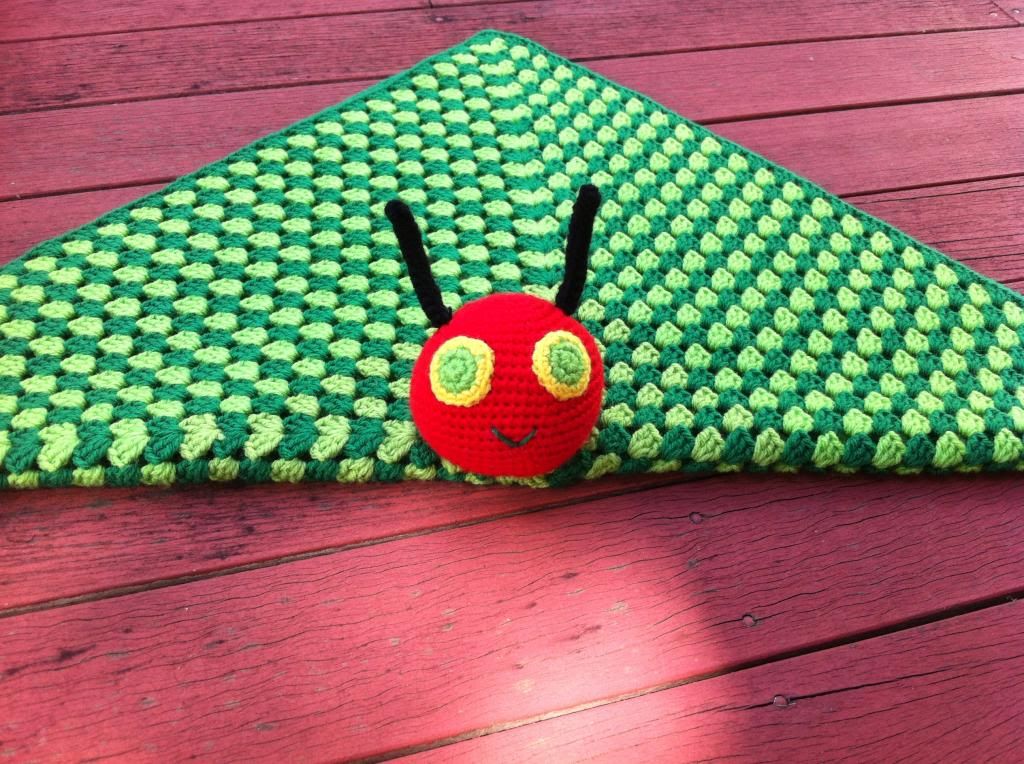
The method I used is very simple, just a big granny square and an amigurumi head of my own design. The head is sewn on to the blanket with black yarn. I blocked the blanket before sewing the head on to make it softer and drapier. See that? I just made up a word. I have to say, I think it turned out pretty well. It still needs a little fine tuning but I already have an order for another one so I know where to do things differently. Make sure I have yarn in all the same shades for example. You can't see it in the pictures but the first few rounds of light green are different to the rest.
Have some pictures!
I saw someone on Instagram had made one but I cannot for the life of me remember who it was so I can't credit them with the inspiration unfortunately.
The method I used is very simple, just a big granny square and an amigurumi head of my own design. The head is sewn on to the blanket with black yarn. I blocked the blanket before sewing the head on to make it softer and drapier. See that? I just made up a word. I have to say, I think it turned out pretty well. It still needs a little fine tuning but I already have an order for another one so I know where to do things differently. Make sure I have yarn in all the same shades for example. You can't see it in the pictures but the first few rounds of light green are different to the rest.
Have some pictures!
Details for fellow hookers: 4mm hook used for blanket, 3.5mm hook for amigurumi head and 100% acrylic DK yarn. Blanket measures approx 56cm x 56cm after blocking.
I'd love some feedback dear readers :)
Tuesday, 26 February 2013
Miss & Master Quick Chick
I sat down last night to make a quick ami, without really having any idea of what I wanted to make. Great designer I am! Anyway, some yellow yarn and a pair of safety eyes later..........I was stuck.
I put the call out on Instagram and Tumblr for suggestions, got a several responses and Quick Chick was born. I am going to make all of the suggestions that got thrown in, they're great!
After a few failed attempts at the beak, wings and feet; here is how she turned out.
She works up quickly and the little bow is just glued on. I reckon she could be made in an evening in front of the chattering cyclops.
ETA: I couldn't help myself and made a little Master to go with Miss. Isn't he dapper?
If you would like to make your own Miss & Master Quick Chick, click here!
Labels:
amigurumi,
bird,
free pattern,
handmade,
link,
photo,
quick chick,
shonamigurumi
Tuesday, 15 January 2013
Accessories
I took the plunge recently and started buying things from Ebay (I know, sometimes I'm a bit slow). Buying safety eyes and whatnot from the craft store is ridiculously expensive in comparison. Anyhoo, I bought some key chain doohickey's off Ebay to have a shot at doing some, you guessed it, key chains. They could be bag charms too, whatever blows your hair back really. I think they are pretty cute, the angel is my fave, she turned out better than I had hoped for! She's also my first ami that I've ever put blushy cheeks on. Here they are in no particular order, because blogger is annoying like that...
Tuesday, 8 January 2013
Ryno Rhinoceros
Say hello to my latest addition!
He has been about a month in the making from conception to photo shoot. I've written the pattern for him, but haven't typed it up yet and made it all pretty with photo's and what not.
I'm very new to pattern writing so I tend to write it as I'm hooking it to make sure it works. However if someone would like to test the pattern for me I'd really appreciate it! Anyway enough of my inane drivel, may I present to you Ryno Rhinoceros!!!
He has been about a month in the making from conception to photo shoot. I've written the pattern for him, but haven't typed it up yet and made it all pretty with photo's and what not.
I'm very new to pattern writing so I tend to write it as I'm hooking it to make sure it works. However if someone would like to test the pattern for me I'd really appreciate it! Anyway enough of my inane drivel, may I present to you Ryno Rhinoceros!!!
Love him or hate him, it would totally rock my socks (if I were wearing any) to have some feedback!
Monday, 31 December 2012
Sailor Ted
Isn't he gorgeous? I'm so proud with my self for managing to get the vision that was in my head onto my hook.
Again, big thanks to Rachel H of Little Yarn Friends for making her pattern free and available to all.
Friday, 28 December 2012
Teddy
My latest effort. Big thanks to Rachel at Little Yarn Friends for being so kind as to make her patterns free.
The golden coloured yarn for this little guy was incredibly soft, weird since his jumper colour was the same brand, ply and 100% acrylic Funny how much variation can be in the one brand! Anyway I'm really happy with how he turned out and he now resides in my spare room for my guests to cuddle up with.
Wednesday, 26 December 2012
Cupcake Pattern
Who doesn't like cupcakes? This pattern is an adaptation of a few patterns made into my own. I'm not terribly happy with how the icing ended up so pointy but that just means I get to make another one a different way :)
Stitches used:
Shonamigurumi
Cupcake
There are many cupcake
patterns out there and this is an adaptation of a few that I like.
Check out Bethan
David's pattern for my main inspiration. I have, however,
changed the icing structure and used a different amount of stitches
for the cake base and Back Loops Only for ribbing.
US crochet terms are used
throughout this pattern and gauge is not important, just keep your
stitches tight so stuffing doesn't show through.
Stitches used:
- Chain
- Single Crochet
- Slip stitch
- Magic Ring
- Single Crochet Back Loop Only
- Single Crochet Increase
- Single Crochet Decrease
You will need:
- 3.5mm hook
- 3mm hook
- Scissors
- Stuffing
- Stitch Marker (whether you put this in first or last stitch doesn't matter, whatever works for you)
- Tapestry needle
- Cake coloured yarn
- Icing colour yarn of your choice
- Red yarn for cherry
- Single strand sewing thread
Abbreviations:
- MR – Magic Ring
- Ch – chain
- sc – single crochet
- sl st – slip stitch
- 2sc – 2 single crochet in one stitch (increase)
- sc2tog – Single crochet 2 stitches together (decrease)
- BLO – back loop only
- rep – repeat
CUPCAKE BASE
Rnd 1. MR, 5 sc in ring, pull tight to
close (5)
Rnd 2. 2sc each st (10)
Rnd 3. *2sc next st, sc next st; rep
from * around (15)
Rnd 4. *2sc next st, sc next 2 st; rep
from * around (20)
Rnd 5. *2sc next st, sc next 3 st; rep
from * around (25)
Rnd 6. *2sc next st, sc next 4 st; rep
from * around (30)
Rnd 7. sc BLO around (30), sl st next
st.
Now we will be making
the paper ribbed and will be working in ROWS not rounds.
*This may be confusing so
contact me if you need to and I will try and talk you through it.*
The important thing here
is to make sure you do the slip stitch at the beginning AND end of
each row so there will be 2 slip stitches next to each other.
Row 8. Ch 8, sc BLO 2nd ch
from hook, sc to end in BLO, sl st next st (this is the base of the
cake)(7)
*the
slip stitches do not count as a stitch*
Row 9. sl st in next st, TURN, sc BLO
(7)
Row 10. ch1, turn, sc BLO to end, sl
st (7)
Repeat Rows 9 & 10 until they meet
up and join by sewing or slip stitching them together. Finish off.
The cupcake base is now finished.
ICING
Work back loops only.
Grab your Icing yarn and your single
sewing thread and crochet the 2 strands together.
Rnd 1. MR, 5sc in ring,
pull tight to close (5)
Rnd 2. sc each st (10)
Rnd 3. *2sc, sc next st;
rep from * around (15)
Rnd 4. sc ea st (15)
Rnd 5. *2sc, sc next 2 st;
rep from * around (20)
Rnd 6. sc around (20)
Rnd 7. *2sc, sc next 3 st;
rep from * around (25)
Rnd 8. sc around (25)
Rnd 9. *2sc, sc next 4 st;
rep from * around (30)
Rnd 10. sc around (30)
Rnd 11. *2sc, sc next 5 st;
rep from * around (35)
Rnd 12. *3sc next st, sl st
next st; rep from * around and FO.
Leave a long tail for sewing
onto base.
CHERRY
Using 3mm hook
Rnd 1. MR, 5 st in ring, pull tight to
close (5)
Rnd 2. 2sc each st (10)
Rnd 3. sc each st (10)
Rnd 4. sc each st (10)
Rnd 5. *sc2tog; rep from * around (5)
Stuff.
Cut yarn leaving a long tail.
Weave yarn through FLO of each stitch
inserting needle from back to front and pull tight to close, thread
leftover yarn through the centre of the cherry to other side to
create stem.
ASSEMBLY
Attach cherry to icing by sewing or
gluing.
Sew Icing to cupcake base ¾ around,
stuff firmly, finish sewing and admire your handiwork!
©2012
This pattern is an original pattern by Shona
T of Shonamigurumi.
Please do not claim this pattern as your own. If you would like to
share this pattern, you may link to this pattern but do not reprint
it on your site. You may keep a copy for your own personal use but
you cannot sell or distribute it. I am more than happy for you to
sell items made from this pattern but please credit and let me know.
Cheers!
Friday, 14 December 2012
New Pattern Underway
I was really pleased with the way my hammer turned out, and have the itch to create something new. I'm really crappy at drawing but I have a grid book that I use for sketching out new ideas. The graph paper helps get me get dimensions right and I can get an idea of when to start increasing and decreasing.
I drew out a few shapes but wasn't happy with any of them. I was having a whinge about this to my partner as we were sitting on the lounge while I played Metal Gear Solid and he starts randomly pointing out things around our house that could be turned in amigurumi and lo, the new pattern idea was hatched. A rhinoceros!
I'm very excited! For once I managed to sketch the shapes easily and the notes and ideas just started flowing. SQUEEE!
I drew out a few shapes but wasn't happy with any of them. I was having a whinge about this to my partner as we were sitting on the lounge while I played Metal Gear Solid and he starts randomly pointing out things around our house that could be turned in amigurumi and lo, the new pattern idea was hatched. A rhinoceros!
I'm very excited! For once I managed to sketch the shapes easily and the notes and ideas just started flowing. SQUEEE!
Una Unicorn
She's a little bit cute isn't she? Credit goes to Rachel H, her pattern can be found at Little Yarn Friends. I used "latch hook" to attach her mane and tail. I had a hell of a time getting her to sit properly! Worked out I just hadn't stitched enough of the back legs on.
Wednesday, 12 December 2012
Amigurumi Hammer
I'm a little bit proud...
I've just completed my first pattern!!!!! It was borne of a need to make something for my Dad for Christmas and I couldn't find a hammer pattern that I liked. He's a builder so I think this is very appropriate.
It took me ages to write and I actually stopped for about a week because I was totally stuck. I made a couple of devil's from another free pattern in the mean time.When I picked up my hammer pattern again, the ideas just flowed and I completed it by the end of the night. I'm so happy with how it turned out!! So without further ado, here 'tis!
Thursday, 6 December 2012
Amigurumi Essentials
The Ami supplies that come with me, whenever I leave the house (you never know when you'll have time to crochet!)
I carry my travelling crochet in a Harry Potter book bag. Sometimes I think there is no hope for me at all =)
My stock of amigurumi supplies is always growing and now takes up 2 storage boxes. I can never have enough yarn. Ever.
- Hook
- Yarn
- Scissors
- Bobby pin for a stitch marker
I carry my travelling crochet in a Harry Potter book bag. Sometimes I think there is no hope for me at all =)
My stock of amigurumi supplies is always growing and now takes up 2 storage boxes. I can never have enough yarn. Ever.
I have a variety of hooks from 2.00mm up to 5.00mm. My all time fave is 3.5mm. I have a few issues with an old injury so I wrap my hooks with fabric to make them fatter to hold and so avoid cramps and sore hands.
I usually make amigurumi's so I find using acrylic works well, it holds it's shape and is machine washable. The downside is that some acrylics are truly awful to hook with. They squeak, they grip when you don't want them to, they aren't joined properly some are just tied with a knot in the skein. That said, I have made many things that I really like with acrylic and will continue to use the cheap stuff until the budget will allow for cotton.
They other supplies I have are a measuring tape, felt, safety eyes, googly eyes, Helmer glue (it's machine washable), beads and a round chopstick and I can tell you, the list goes on.
The chopstick made it's way into my ami supplies as I needed something to bore out the hole in some safety eyes I'd bought off eBay. The backing hole was too small to fit onto the eye and after trying several things around the house including pliers and a screw, I rememebered the chopsticks in the drawer that we don't like to use because they are too slippery for picking up food. Turns out they are perfect for boring out the eye backing and stuffing fibrefill into small ami pieces!
Buggin'....
Ladybug was made at the request of one of my Facebook liker's. After I made one, I quickly had requests for another 2 which was really exciting! The pattern for these gorgeous girls come from the Lion Brand Yarn site. They have tonnes of patterns for knitters and hookers (teeheehee, I've always wanted to use that term!) alike. Mine are a little different to the ones on their page but very cute nonetheless!
Monday, 5 November 2012
Whale of a time
This little guy is my cars' mascot, he's jammed up against the windscreen to keep an eye on what's coming toward me. He is still one of my favourite ami's that I ever made. Again, he was pretty simple, all single crochet and slip stitches. His design can be found here. The link will take you to a pattern for an Orca but I changed the colours and didn't do the cheek patches.
Hooot HOOOOT!!
Little owls. I actually made the first few for my fabulous mum and sent them to her. She has a bit of an owl fascination.
These critters were made from this pattern. It was my first experience doing a stitch other than a single crochet into a single crochet. The base of these owls requires that you single crochet into the back loop only (BLO). It confused the hell out of me until I worked out that I just had to put the hook through one loop of the single crochet. I think I even had to look it up.
Bzzzzzzz
This divine little bee was the very first ami that I sold. Such a proud moment!! The pattern for this little guy can be found here. It's quite a simple project. Instead on doing the 6 single crochet in the 1st stitch I did a Magic Ring. This method is used a lot in amigurumi and eliminates the little hole that can occur when doing it the other way.
Saturday, 27 October 2012
Baby Monsters
After finishing Joggle, I really began to crochet in earnest. Baby monsters came next. The pattern for these cutie pie's can be found here. It has awesome step-by-step instructions.
Subscribe to:
Posts (Atom)
.jpg)